Category: Pizza Recipes & Tips

  • How to Make Pizza Sauce For Cast Iron Pizza

    How to Make Pizza Sauce For Cast Iron Pizza

    When you’re making pizza you want it to the best damn pizza you can make, right? Then make sure you spend time on preparing the pizza sauce! Like every element of your pizza, the sauce is one the 3 pillars to a good pizza (the other two pillars are the dough and cheese if you couldn’t figure that out); make sure that pillar stands tall and proud!

    Pizza Sauce

    I’m going to show you how to make a rich and thick pizza sauce for your beautiful cast iron pizza. I’ve experienced countless home-made pizzas where the sauce used is straight from a can or jar without any prep. While this is certainly a natural thing to do, and easy… please stop!

    It’s not difficult to create a good pizza sauce; bear with me! I gotta be honest, my love for pizza has fond memories of Pizza Hut Pan Pizza (please don’t leave). I love it when there’s a thick amount of sauce that straddles and overlaps the crust on their pizza – sauce that has managed to escaped from the weight of the cheese – congrats to you, sauce! I like my sauce thicker. Often times when you buy sauce in the can, you’re missing that thickness factor (and flavor).

    By just using sauce directly from a jar or can you’re missing tomato paste. But you’re also missing the love and care to make it more flavorful. So here we go – here’s how I prepare my sauce and encourage your to try and vary it up.

    Ingredients:

    ItemBrandAmount
    All Purpose Crushed TomatoesCento28oz.
    Tomato PasteContadinaAround 10oz.
    SaltJust under 1 TSP
    SugarJust over 1 TSP
    BasilJust under 1 TSP
    OreganoJust under 1 TSP
    MarjoramJust under 1 TSP
    Garlic PowderJust under 1 TSP

    The above numbers are guidelines. If you want your sauce to taste more sweet, maybe add more sugar and less salt than I do. I have to admit, I think my numbers could be a bit higher than some may expect, but I want my sauce rich. I like my sauce a tad more sweet but not a sweet sauce per se’. So I make a point to put a heaping TSP and a tad less salt.

    Directions:

    • Pour the crushed tomatoes and paste into a large enough pot
    • Add the rest of the ingredients
    • Cook the sauce on the stove-top for 45 minutes on a low-medium heat. You will need to monitor your sauce as medium may be too high.
    • Stir the sauce every 10 minutes
    • When done, move off that burner and let sit. I do my sauce in the mornings so it sits and cools for hours. If you want you can also do your sauce ahead of time and freeze it, etc. However you know how upset Gordon Ramsey get’s upset when everything is not fresh! To each his own.

    A note about cooking the sauce. I have an electric stove and set the burner to 2 or less. I have found that even on a lower temp, the sauce has burned before so to be safe, I generally do it on a lower heat. But I may start the sauce a bit higher just to get it going then bring it back down.

    Applying the sauce to the dough

    When I spread my sauce I will try and to it in a nice circle, sort of how you see them do it at Pizza Hut or likely most other restaurants. I like my sauce to be caked on thick! Not only will your sauce taste great but try to spread it evenly even to the edges of the dough, leaving only a little crust showing. It’s OK if your pizza sauce touches your cast iron skillet! Keep in mind, as the pizza cooks things will move around a bit and you’ll likely end of having more crust showing than expected, so experiment – bring the dough virtually to the end of the dough!

    Give this recipe a try. I hope it works out great for you!

  • Perfecting Pizza Dough: Proofing for Cast Iron Cooking

    Perfecting Pizza Dough: Proofing for Cast Iron Cooking

    When it comes to crafting a stellar pizza in a cast iron skillet, the dough is the foundation of flavor and texture. Proofing—the process of letting the dough rise—is a critical step that can make or break your pizza. Here’s a deep dive into proofing dough specifically for cast iron pizza, balancing technique with the unique properties of this cooking method.

    Why Proofing Matters for Cast Iron Pizza

    Cast iron delivers intense, even heat, creating a crispy, golden crust with a slightly chewy interior. However, the heavy, conductive nature of cast iron means the dough needs to be prepped just right to avoid a dense or uneven bake. Proper proofing ensures the dough develops airiness, structure, and flavor, allowing it to stand up to the skillet’s high heat while achieving that coveted crust.

    Proofing allows yeast to ferment, producing carbon dioxide that gives the dough its rise and lightness. For cast iron, where the dough cooks in a confined, hot environment, a well-proofed dough ensures a balance of crisp exterior and soft, airy interior.

    Proofing Steps for Cast Iron Pizza Dough

    1. First Proof: Building Structure and Flavor

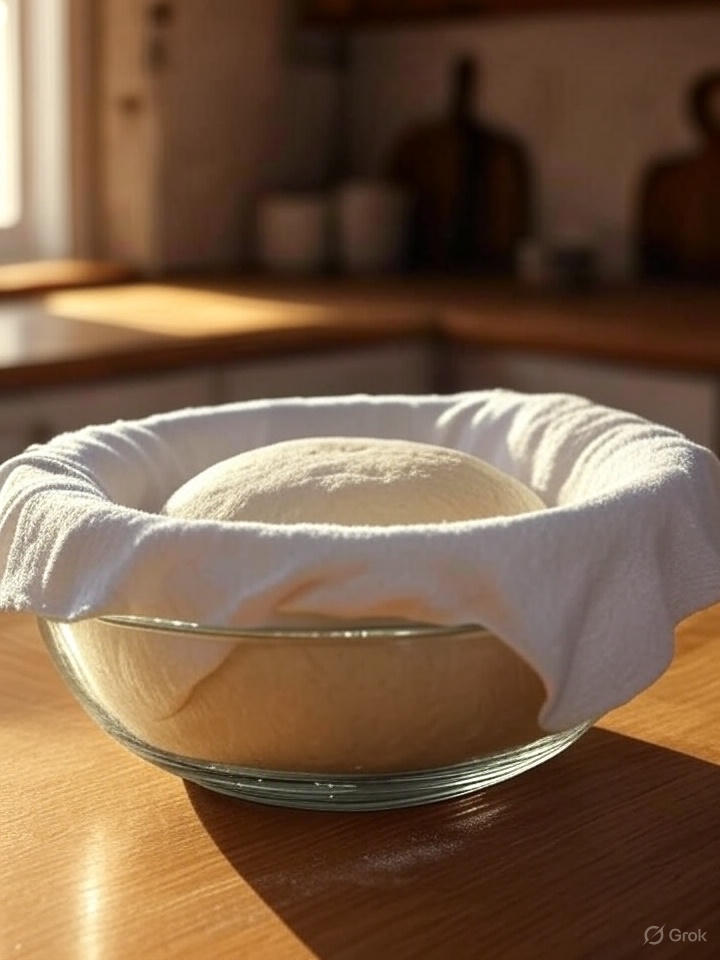
    After kneading, place the dough in a lightly oiled bowl, cover it with a damp cloth or plastic wrap, and let it rise in a warm spot (75–85°F) for 1–2 hours, or until it doubles in size. This initial proof builds the dough’s structure and allows fermentation to develop subtle flavors.

    Tip for Cast Iron: Don’t rush this step. A longer, slower rise (even up to 8–12 hours in the fridge) enhances flavor complexity, which pairs beautifully with the caramelized crust you’ll get from cast iron.

    2. Shaping for the Skillet

    Once doubled, gently punch down the dough to release excess gas. Divide it into portions (one 12-inch cast iron skillet typically takes a ball of dough about 300–350g). Shape into a smooth ball and let it rest for 10–15 minutes to relax the gluten, making it easier to press into the skillet.

    3. Second Proof: Prepping for the Pan

    Lightly oil your cast iron skillet to prevent sticking and add a touch of richness to the crust. Gently press the dough ball into the skillet, spreading it evenly to the edges. Cover loosely with a cloth or plastic wrap and let it proof again for 20–30 minutes. This second proof ensures the dough puffs up slightly, creating a light, airy texture that won’t collapse under toppings.

    Why It’s Key for Cast Iron: The skillet’s heat can cause the dough to set quickly, so this second proof gives it the airiness needed to avoid a dense crust. If the dough feels too tight or springs back, let it rest longer before shaping.

    4. Cold Proofing (Optional but Recommended)

    For even better flavor, consider a cold proof. After the first rise, shape the dough into balls, wrap tightly, and refrigerate for 24–48 hours. When ready to bake, let the dough come to room temperature (about 1 hour), then press it into the skillet and proceed with the second proof. Cold proofing deepens the dough’s flavor, giving your pizza a sourdough-like tang that complements the robust crust from cast iron.

    Tips for Proofing Success

    • Temperature Control: If your kitchen is cold, place the dough in an oven with the light on or near a warm appliance to maintain 75–85°F during proofing.
    • Don’t Overproof: Overproofed dough can collapse, leading to a dense crust. Watch for doubling in size, and press gently—if the dough springs back slowly, it’s ready.
    • Hydration Matters: Cast iron works well with doughs at 60–70% hydration (water weight relative to flour). Too wet, and the dough may stick; too dry, and it won’t rise well.
    • Skillet Prep: Preheat your cast iron in the oven at 450–500°F for at least 45 minutes after the second proof. This ensures a crispy base without burning the toppings.

    Why Cast Iron Loves Well-Proofed Dough

    The magic of cast iron lies in its ability to retain and distribute heat, searing the dough for a crust that’s crispy outside and tender inside. A properly proofed dough maximizes this effect by creating a network of air pockets that expand in the heat, giving you that perfect balance of crunch and chew. Underproofed dough will be dense and tough; overproofed dough may deflate, leaving a flat crust.

    Final Thoughts

    Proofing dough for cast iron pizza is all about patience and precision. Take the time to let your dough rise properly, and you’ll be rewarded with a crust that’s crispy, flavorful, and perfectly suited to the skillet. Whether you opt for a quick same-day proof or a slow cold ferment, the key is to let the dough develop enough structure to shine in the intense heat of cast iron. Grab your skillet, fire up the oven, and enjoy a pizza that’s as rustic as it is delicious!

  • Pre-Shredded Cheese vs. Grating It Yourself: What’s Best for Your Pizza?

    Pre-Shredded Cheese vs. Grating It Yourself: What’s Best for Your Pizza?

    When it comes to crafting the perfect homemade pizza, the cheese you use can make or break the experience. While it might be tempting to grab a bag of pre-shredded cheese for convenience, taking a few extra minutes to grate your own cheese can significantly elevate your pizza’s texture, flavor, and melt. But what’s the actual difference—and is it worth it?

    Let’s break down the pros and cons of each and explore why grating your own cheese might just be the game-changer your pizza nights need.

    The Difference Between Pre-Shredded Cheese and Freshly Grated Cheese

    Pre-shredded cheese, like the kind you’ll find in resealable bags at the grocery store, is undeniably convenient. It’s ready to sprinkle, melts fairly well, and cuts down on prep time. However, that convenience comes at a cost.

    Pre-shredded cheese is often coated with anti-caking agents such as potato starch, cellulose, or even powdered cornmeal. These are added to keep the shreds from clumping together in the bag—but they also prevent the cheese from melting smoothly and evenly.

    In contrast, cheese you grate yourself is free from additives. You’re working with a block of pure cheese, whether it’s mozzarella, provolone, cheddar, or even parmesan. This means better melting, cleaner flavor, and fewer unnecessary ingredients.

    Why Grating Your Own Cheese Is Better for Pizza

    1. Superior Melt Quality

    Freshly grated cheese melts more evenly and creates that gooey, stretchy pull you want in every slice. There are no starches to get in the way of that glorious melt.

    2. Enhanced Flavor

    Pre-shredded cheese often lacks the same punch as freshly grated blocks. That’s because the preservatives and packaging dull the flavor over time. Freshly grated cheese keeps its natural oils and richness intact.

    3. Better Browning and Texture

    Whether you love a bubbly, golden-brown top or a crisped cheesy edge, grating your own cheese gives you better control. Without fillers, the cheese reacts more naturally to the oven’s heat.

    4. Custom Blends

    Grating your own cheese lets you experiment and create unique blends. Mix mozzarella with fontina, provolone, or smoked gouda for your own signature pizza cheese.

    5. Cost Savings Over Time

    Block cheese is often more economical per ounce than bagged shredded cheese. Grating it yourself gives you more cheese for your dollar—and better quality, too.

    When to Use Pre-Shredded Cheese (If You Must

    We get it—sometimes you’re in a hurry or cooking for a crowd and need shortcuts. Pre-shredded cheese can still work in a pinch, especially for lower-heat recipes or non-pizza dishes like casseroles or quesadillas. Just know that your pizza might not achieve that perfect melt or flavor you’d get with freshly grated cheese.

    Final Thoughts: Elevate Your Pizza with Freshly Grated Cheese

    At the end of the day, grating your own cheese is a small step that yields big rewards—especially when it comes to pizza. The melt is cleaner, the flavor is richer, and the whole experience feels more authentic. So next time you’re prepping your pizza dough, reach for the box grater and a block of cheese. Your taste buds will thank you.

    Pro Tip: Use a low-moisture mozzarella for that classic pizzeria stretch, or blend it with a touch of sharp provolone for an extra savory kick.

  • New to Cast Iron Pizza? Avoid These 5 Rookie Mistakes

    New to Cast Iron Pizza? Avoid These 5 Rookie Mistakes

    Cast iron pizza is beginner-friendly, but pitfalls can trip you up.

    • Don’t skip preheating—45 minutes at 500°F ensures a crispy crust.
    • Avoid overloading toppings; too much sauce or cheese leads to a soggy pie.
    • Don’t use cold dough—let it rest at room temperature for 30 minutes for better stretch.
    • Never wash your skillet with soap; it strips the seasoning (use hot water and a scraper instead).
    • Finally, don’t rush the cooling process—let the pizza sit 3-5 minutes before slicing to lock in flavors. Follow these tips, and you’ll be a cast iron pizza pro in no time!